Create OpenShift Router Connector
Configuration steps on ose-mstr01
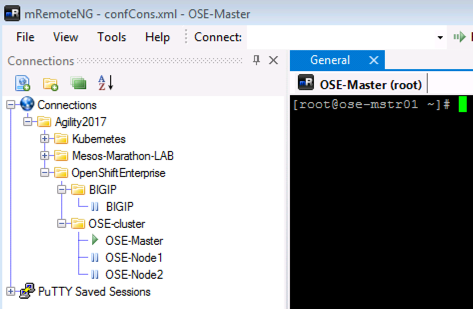
Using MremoteNG, go to the OpenShift folder, and connect to OSE-Master
The next step logs you into Openshift Client
oc login -u demouser
You will be prompted for password, which is: demouser
Next let’s explore the f5-hostsubnet.yaml file
cat f5-hostsubnet.yaml
You’ll see a config file similar to this:

This YAML file create an OpenShift Node and the host is the BIG-IP “with /23 subnet of IP’s (3 images down)”
Next let’s look at the current cluster, you should see 3 members (1 master, 2 nodes)
oc get hostsubnet

Let create the connector to the BIG-IP device, then look before and after at the attached devices
oc create -f f5-hostsubnet.yaml
You should see a successful creation a new OpenShift Node

Nothing has been done yet to the BIG-IP, this only was done in the OpenShift environment.
oc get hostsubnet
You should now see OpenShift configured to communicate with the BIG-IP

The next step is to do is create an Openshift F5 Container Connector to do the API calls to/from the F5 device.
Setting up the Container Connector
First, let us examine a few items in a configuration YAML file. You can ”cat f5-cc.yaml” or just review the config below.
We see the credentials to authenticate to the BIG-IP, the container image name, and which namespace this container will live in.
Communications: IP of the BIP-IP to communicate to for API calls, and which tunnel to use to/from the BIG-IP.
”f5-cc.yaml”
apiVersion: extensions/v1beta1
kind: Deployment
metadata:
  name: k8s-bigip-ctlr
  namespace: demoproject
spec:
  replicas: 1
  template:
    metadata:
      name: k8s-bigip-ctlr
      labels:
        app: k8s-bigip-ctlr
    spec:
      containers:
        - name: k8s-bigip-ctlr
          image: "f5networks/k8s-bigip-ctlr:1.0.0"
          command: ["/app/bin/k8s-bigip-ctlr"]
          args: [
            "--bigip-username=admin",
            "--bigip-password=admin",
            "--bigip-url=10.10.200.98",
            "--bigip-partition=kubernetes",
            "--namespace=demoproject",
            "--pool-member-type=cluster",
            "--openshift-sdn-name=/Common/ose-tunnel"
          ]
      imagePullSecrets:
       - name: f5-docker-images
Stay on the OSE-Master CLI, and enter
oc create -f f5-cc.yaml

and

watch oc get pods
I’ve seen 20 containers spin up <1 second on my laptop, as well as minutes depending on long downloads of the image first time.
As ContainerCreating is dependent on many factors i.e. first download remotely, you host your own local images, or it’s already cached on the host.
As we watch it change from ContainerCreating…

To Running state, once you see this go ahead and CTRL-D out of the watch routine

Last step - create a virtual server and pool
Examine a few more items in this YAML file. Either ”cat f5-vs2.yaml” or just review the config below.
This has the Virtual IP/port/LB method, health monitor, could have an APM policy or iRule for instance.
”f5-vs2.yaml”
kind: ConfigMap
apiVersion: v1
metadata:
  # name of the resource to create on the BIG-IP
  name: f5k8s2.vs
  # the namespace to create the object in; must match the namespace of the
  # service you want to proxy and the namespace the k8s-bigip-ctlr is
  # configured to watch
  namespace: demoproject
  labels:
    # the type of resource you want to create on the BIG-IP
    f5type: virtual-server
data:
  schema: "f5schemadb://bigip-virtual-server_v0.1.2.json"
  data: |
    {
      "virtualServer": {
        "backend": {
          "servicePort": 8080,
          "serviceName": "deployment-example",
          "healthMonitors": [{
            "interval": 30,
            "protocol": "http",
            "send": "GET",
            "timeout": 86400
          }]
        },
          "frontend": {
          "virtualAddress": {
            "port": 80,
            "bindAddr": "10.10.201.99"
          },
          "partition": "kubernetes",
          "balance": "round-robin",
          "mode": "http"
        }
      }
    }
Last step: enter the command below to Launch this virtual server on the BIG-IP and create and populate a pool for the virtual server (VIP)
oc create -f f5-vs2.yaml
Jump back over to the BIG-IP and look at the Virtual Server and Pool Don’t forget to be in the Kubernetes Partition